
Build the right product photography setup for your space
Build a repeatable setup that gives you sharp, consistent product photos without rebuilding the room after every shot.
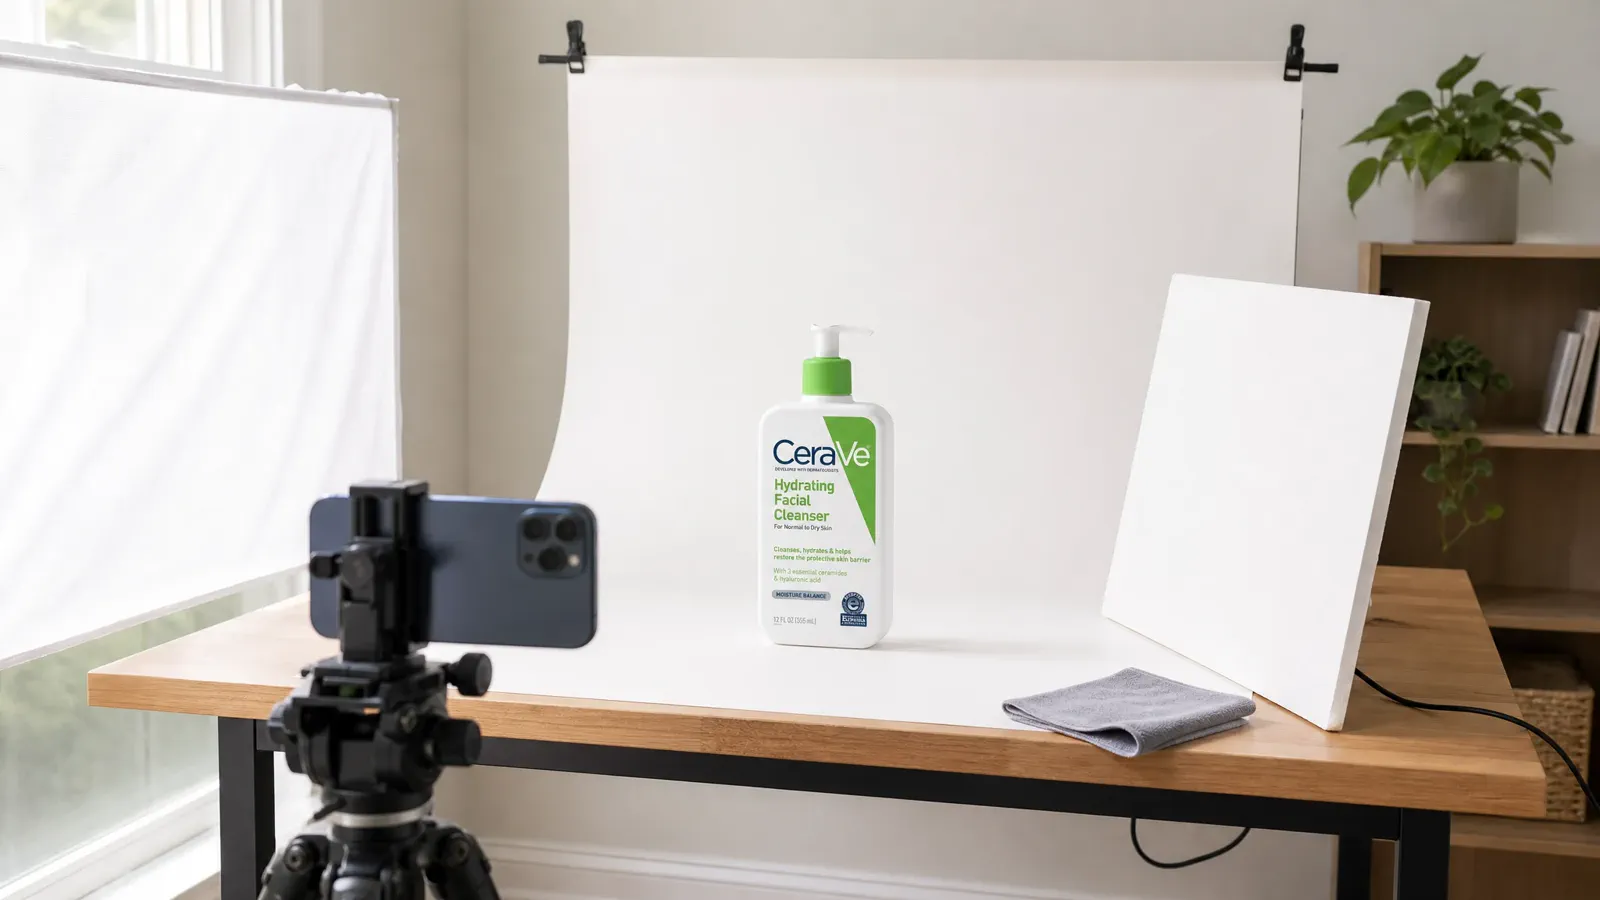
Start with the smallest setup that fits your product, material, room, and final image. A stable surface, fixed camera, simple background, one soft light, and a reflector are enough for many tabletop jobs.
Use the selector and test sequence below to choose a layout, place each element, and diagnose whether an unwanted result comes from support, light, camera position, or the product itself.
Setup selector
Choose a setup that fits the product and the room
There is no universal best setup. Record five inputs, then choose the least complex arrangement that provides enough control for the job.
0 items selected for the next test or capture record.
Anchor setup
Place and record five controlled positions
Build from one continuity case. The overhead plan, side view, position marks, test frame, and selected result should describe the same product and arrangement.
Product and surface
Choose a stable surface, clean the product, set its orientation, and mark the product position. Record supports that are hidden from the final frame.
Background
Secure a sweep or flat background without a distracting seam. Leave enough width and height for the intended crop and camera angle.
Camera position
Fix the support, camera height, angle, working distance, and lens or device choice. Keep the product geometry natural and mark the support location.
Light context
Record the source, distance, angle, diffusion, and ambient-light state. This page defines the footprint; detailed light behavior belongs in the lighting guide.
Reflector or flag context
Place a white reflector to open a dark side or a dark flag to control a reflection only when the test frame shows the need. Record its position with the rest of the setup.
Adapt by evidence
Know when the same footprint no longer works
Do not add a specialist branch because it sounds comprehensive. Change the setup only after a small test exposes a practical limitation.
Reflective or transparent products
Escalate when the room, camera, or light source appears uncontrollably in the surface, edges disappear, or there is not enough space for diffusion and flags. A larger controlled footprint may matter more than another light.
Soft goods
Change the support and footprint when folds, shape, suspension, or styling cannot remain repeatable. Record the garment state and support method rather than treating it as a tabletop object.
Large products
Increase working distance, background size, light-control area, and safety clearance. If the product cannot be moved or supported safely, plan the room around it.
High-throughput catalogs
Add jigs, marks, reference frames, naming rules, and reset steps when consistency across products matters more than rapid improvisation.
Troubleshooting
Diagnose the physical setup before changing everything
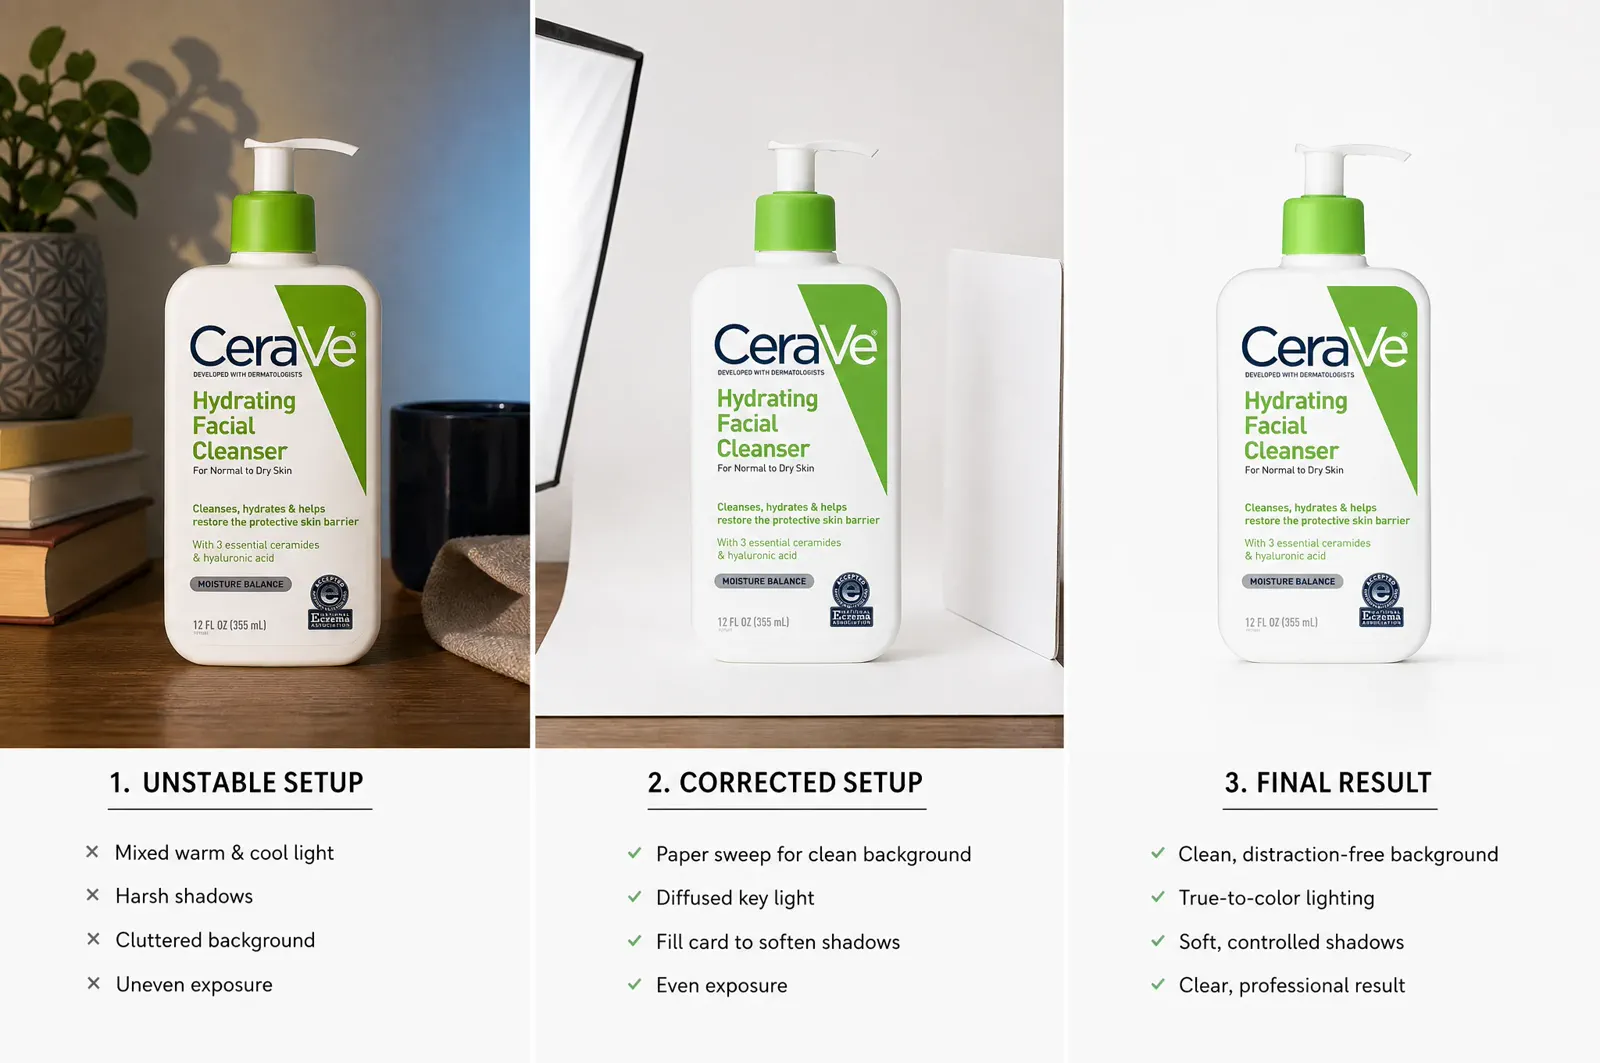
Hold the documented arrangement constant, change one named cause, and compare the result at the same review size. That makes the correction reproducible.
Cramped framing
Move the camera back or enlarge the background footprint before using a wider view that distorts the product. Preserve room for the destination crop.
Movement or unstable geometry
Secure the camera and product, check the center of gravity, and use position marks. Then retest before changing exposure or focus.
Visible seam or dirty background
Increase the sweep radius, secure the material, clean the surface, and inspect the full intended crop instead of relying on a later patch.
Mixed ambient light
Control other light sources and repeat the test under one recorded condition. Continue into the lighting guide when the problem is source size, direction, or reflection shape.
No room for reflection control
Increase the distance around the product or move to a larger controlled area. Adding small modifiers inside a cramped setup may create more visible reflections.
Before the first shot
Make the arrangement repeatable
Product ready
The product is clean, correctly assembled, factually complete, safely supported, and placed on its mark.
Positions recorded
Camera height and angle, product orientation, background, light, reflector or flag, and ambient-light state are recorded.
Frame ready
The product geometry is natural, the background fills the crop, and the final placement has enough safe space.
Test frame reviewed
Focus, color, edge visibility, reflections, shadows, label detail, and unwanted room elements have been inspected at full size.
Reset possible
Marks, reference frame, notes, and equipment settings are sufficient for another person to rebuild the setup.
Learning path
Hand the next problem to the right guide
Once the physical footprint is sound, continue only where the observed problem belongs.
Choose equipment for the footprint
Use the equipment guide when the arrangement needs safer support, more working distance, better diffusion, or a more reliable review process.
Control the light
Use the lighting guide when the remaining problem is source size, direction, contrast, glare, or reflection shape.
Choose exposure and focus
Use the camera-settings guide after movement, geometry, and light contamination are controlled.
Complete the shooting workflow
Use the full how-to guide to move from the ready setup through shot planning, capture, selection, editing, and export.
Questions that need judgment
Frequently asked questions
These answers cover the exceptions and review tests that still depend on context.
How can I tell whether a product photography setup is truly repeatable?
Mark the product, camera, background, light, and reflector or flag positions. Record camera height and angle, light source and ambient state, product orientation, and a comparison frame. Rebuild the setup from those records and compare the new frame at the same crop and review size. “Looks similar” is not enough when product geometry, crop, or catalog consistency has changed.
When has a home tabletop setup been outgrown?
Use observed constraints rather than a “professional” label. Move on when the product does not fit safely, the camera lacks working distance, the room creates uncontrollable reflections or mixed light, the background cannot cover the crop, repeated resets are inconsistent, or throughput and storage make the arrangement impractical.
How do I know whether a failure comes from the setup, lighting, or camera settings?
Isolate the problem in order. First secure the product and camera and correct geometry. Next control ambient light and verify the light footprint. Only then test exposure, focus, and motion. Keep the other conditions fixed while changing one major variable. The stage that removes the failure identifies the next guide or corrective action.
What extra safety planning is needed for overhead or large-product setups?
Use supports rated for the actual load, check center of gravity and every lock, secure stands and suspended equipment, define an exclusion zone, remove trip hazards, and plan safe product handling. Never work beneath an unsecured camera or modifier, and follow the equipment manufacturer’s load and safety guidance.
Skip the studio rebuild
Turn a clear tabletop photo into a commercial product scene
Use the best photo from your current setup. Adyvi can build ecommerce, lifestyle, and campaign scenes around the same product, so every new direction does not require another physical set.
Create a commercial scene from my photo